Wednesday, May 23, 2012

Love you, man!

I was perusing Pinterest and found this little framed delight...
I love its simplicity and shadow frames are so fun and dimensional.  I put it on my "Art to DIY" board for a later date.  Well, that day has come!  I appreciated the simplicity of the design of the inspiration but wanted a little more pizzazz, if you will.  I also wanted to show off my Silhouette cutter to my mom when she was visiting.  Here is my pile of supplies: a shadow frame with no glass cause it was on the ground at some point and I stepped right into it and broke it (oh yeah.  I'm smooth), some Scrabble tiles from an antique store, and a pack of scrapbooking papers.  

First step was to find two complementary papers, which resulted in an orange dotted paper and a orange-themed floral.  I used my Silhouette to cut a square out of the dotted paper for the background (honestly, it is worth its weight in gold to me just because it does that easily) and a letter collage from the Silhouette store for on top.  Initially, I had some trouble because the design was so intricate and my mat was so sticky, but a little online research and some t-shirt dabbing (to get some fibers on the mat and reduce the tackiness), and it came off perfectly!  I used spray adhesive so I didn't have to worry about any bubbling, excess, or not enough glue and layered the two together.  I positioned my tiles first (to see what placement I liked) and then used E-6000 adhesive to adhere them.  Put all together again and voila!  

I gave it to my husband for a little reminder of how awesome I think he is, and he gave me something for my birthday that completes the look!  Meet Flopsy and Mopsy!

He is buying into my love of white ceramic animals (I'll do a run-down of all of those sometime later).  Aren't they cute together?


Tuesday, May 22, 2012

A little bling

My husband's cousins were visiting St. Augustine a while ago and their three children all happened to have a birthday within that month, so I decided to make a little something for their little girl.  We sent gifts to all of them of course, but this is the blingiest of them.


I had most of these supplies left over from a jewelry-making phase.  I used some chain and attached some pink pearls and charms with some small jump rings.  I used the clasp that I thought would be easiest for her to use, and it will grow a bit with her if she still likes it for awhile.  I just hope it will remind her of Florida and the vacation she spent here.

Cheers to craftiness!

Monday, May 21, 2012

Is it a bib? Is it an apron? It's a bapron!

So a friend of mine had a baby a little while ago, and I was searching for a suitably homemade gift to give the happy parents.  I came across this little gem on Pinterest.
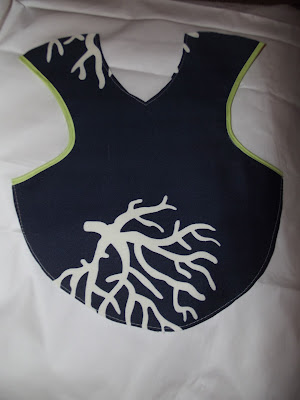
The tutorial is pretty thorough and can be found here. I took a couple of pictures along the way.  I bought the bias tape at Joann, but honestly, after looking at the tutorials on how to make it, I will probably do it myself from now on.  It's mostly just folding something in half and ironing.  I mean, seriously.  Here are the two pieces to baste together.


I used some leftover indoor/outdoor fabric from previous projects thinking it might make cleaning the bapron easier in the future.  Here it is with the bias tape on it.  

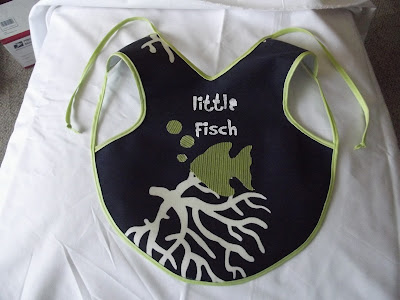
I wanted to add something cute and personal to the front, so I used my Silhouette Cameo (love that thing!) and cut a fish with bubbles out of some cute material.  I used Fray Check on the edges and just fabric glued it on.  I then used my Silhouette to cut a stencil out of vinyl and used fabric paint to make the "little fisch" print on the front.  

My friend's surname is Fischetti, so "little fisch" is not just a typo.  Here it is all finished!  I hope they will get good use out of it in the future!  


   I am in love with this thing.  It's just so darn cute!  I keep threatening that I am going to make adult-sized ones for the sloppier eaters in my family.  It's definitely my newest favorite baby present!  


Tuesday, May 15, 2012

To bee or not to bee

Sorry for the Hamlet/insect pun.  I'm an English teacher; I can't really help myself.  

This is my new favorite decorative thing, and my only regret is that I do not have a ton of wall space with which to create and use more of these.  This was my inspiration.  
I searched my favorite local antique store for an old dictionary that had the font size that I wanted to no avail.  But I did spot an old collection of Shakespearean plays which my friend happened to kindly buy for me.  (Thanks Danni!)  As an ex-librarian and self-professed book hoarder (I'm getting better, I swear), this was a tough step for me, but I took my x-acto knife and cut out some pages to feed into my printer.
I found this cool blog that posts a vintage image every weekday and scanned a bunch of images to find the ones I wanted.  I found some others using Google images that seemed to be ( I say "seemed" since copyright law is complicated business) okay to use.  Here is one collection.

If you can't tell from the shadowed picture (sorry about that! figuring out my new camera still), I have a shell on the left, a crab in the middle, and a fish on the right.  

I made another to give my mom for Mother's day (with each picture representing a member of our family), but forgot to get a picture of it before sending it home with her.  This is one of those instant gratification projects that I love. All you need is a book, a knife, a printer, and a dream!

Tuesday, May 8, 2012

Who knew cutting things could be so much fun?

Okay, that title sounds a little macabre.  I only meant that cutting things with my new Silhouette Cameo is so fun!  Even knowing that this thing exists in my house gives me immeasurable pleasure.


I used it first to create these river rocks for my AP students.


Yes, I am giving them rocks as a good luck gesture for the test.  You'd have to hear my spiel about the symbolism, I guess.  I used the Cameo to cut out the vinyl small seal script figure.  It's the ancient Chinese character for literature and it's pretty simple for the silhouette, but would have been a pain for me to attempt with an x-acto knife.


I had the image scanned to a PDF, and I copied the image into the Silhouette software.  I used the trace function to outline the shape (amazing!) and cut away!  I did them in a variety of sizes according to the varying rock sizes, and the smallest one is pretty darn tiny!  I wrote the course, year, and signed the back of each so they can keep them as a memento of the class if they want.  I still have the mini-beanie baby my AP Calculus teacher gave us before the test.  That's also the test I got a 5 on; coincidence? Anyway, I'm very happy with the way they turned out and hope my students will look at them and feel serene and confident during the test.


Every make any memento for an occasion?  Have a silhouette cameo story/project to share?

Wednesday, April 25, 2012

O True Apothecary!


As an English teacher, I cannot ever resist a good Shakespeare quote opportunity.  Romeo's death scene? Ring a bell from many moons ago? "Thy drugs are quick.  Thus with a kiss I die."  Gets me a little choked up even now.  Anyway!  Apothecary jars have really been everywhere lately it seems and you can apparently put anything in them.
Eggs and candy 

Miniature gourds

Woods-themed objects
Office supplies

Some ornaments and pine cones for a winter theme!
All via Pinterest

I couldn't resist getting in on the action.  It start when I found this guy at a flea market for $5. I just filled him with dollar-store decorative marbles and put him on our mantel next to Girard (our French white ceramic panther).


That was not enough to satisfy.  I had read somewhere about using E-6000 glue (heavy duty) to affix glass candlesticks to containers to create your own apothecary jars.  I found a covered glass container at the dollar store, some candlesticks at Goodwill, a little time on my hands (often hard to come by) and voila!


It's out in the glassroom on the shelf over the keyboard.  I am going for gray and white with yellow accents and pops of teal out there as a color scheme.  For my filler, I just took some dried beans (that I never end up cooking, what can I say? I'm a canned bean kind of girl) and spray painted them a happy yellow color!  It adds a little pop of color in that corner.

I then found another cute little container at Goodwill (it's hit or miss, but I love stopping in just in case there is something awesome that day) and another candlestick. You may wonder what I have against candlesticks in their original form, but I'm just not into tapered candles for some reason.  Pillars are what tickles my romantic light fancy.  A little glue later, and I have this...

He's a little guy, but I like the cut glass look.  I can almost imagine some Jordan almonds in him or something, although that seems like an odd choice for me.  I have yet to fill him with something since so far I just like how he looks and the bit of sparkle he adds to that shelf.  

What do you think?  I've expanded my gluing interest to other things, but I'll share that next time. 


Tuesday, April 24, 2012

Pop goes the weasel!

I made a piece of art for my husband a while ago, but I wanted to share.  I had seen painted canvases of pop-art styled pets and thought they were super cute.  Like these...


All via Pinterest

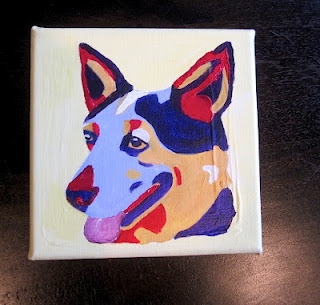
But the price tags I saw associated were distressing to a relative cheap-o like me (especially about art which I like to attempt to DIY first).  So I followed the instructions of one Melissa Evans (here is the link to her tutorial) pretty much to the letter and got this.
I've got each of our animals represented from left to right top to bottom, Fatima, Koko, Obi, and Lady.  We have it hanging so we see it on the way into our bedroom.  It makes me smile pretty much every time I see it, and isn't that really the point?